Are you considering a new driveway solution? Driveway resin bound surfaces might just be the answer. Known for their durability and seamless finish, these surfaces are becoming popular among homeowners. This article will walk you through what they are, their benefits, installation steps, and maintenance tips.
Key Takeaways
- Resin bound driveways offer a customizable, durable, and aesthetically pleasing solution, enhancing the property while being environmentally friendly through permeability.
- The installation process requires proper base preparation, meticulous mixing of materials, and patience during curing to ensure a high-quality finish.
- Cost factors include the size and shape of the driveway, choice of materials, and whether to choose DIY installation or hire professionals, both of which have distinct advantages and considerations.
Understanding Driveway Resin Bound Systems
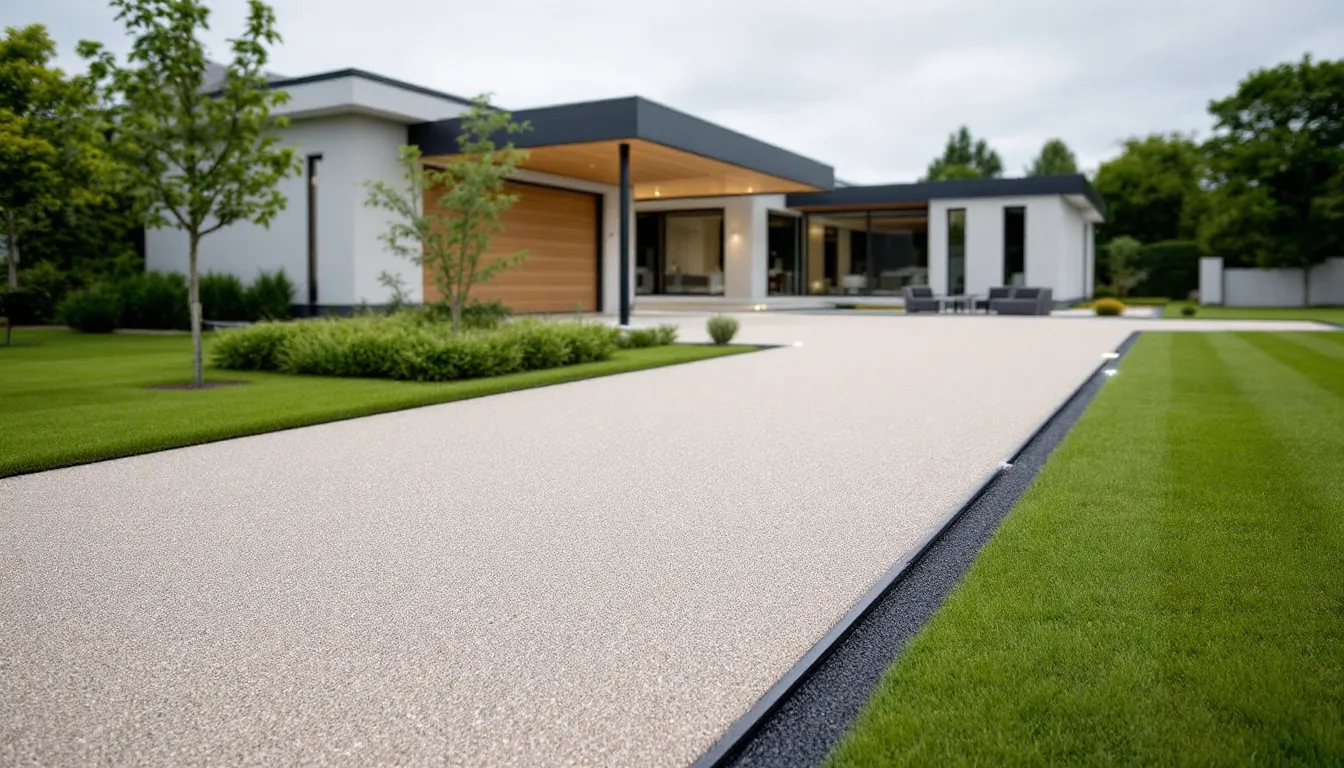
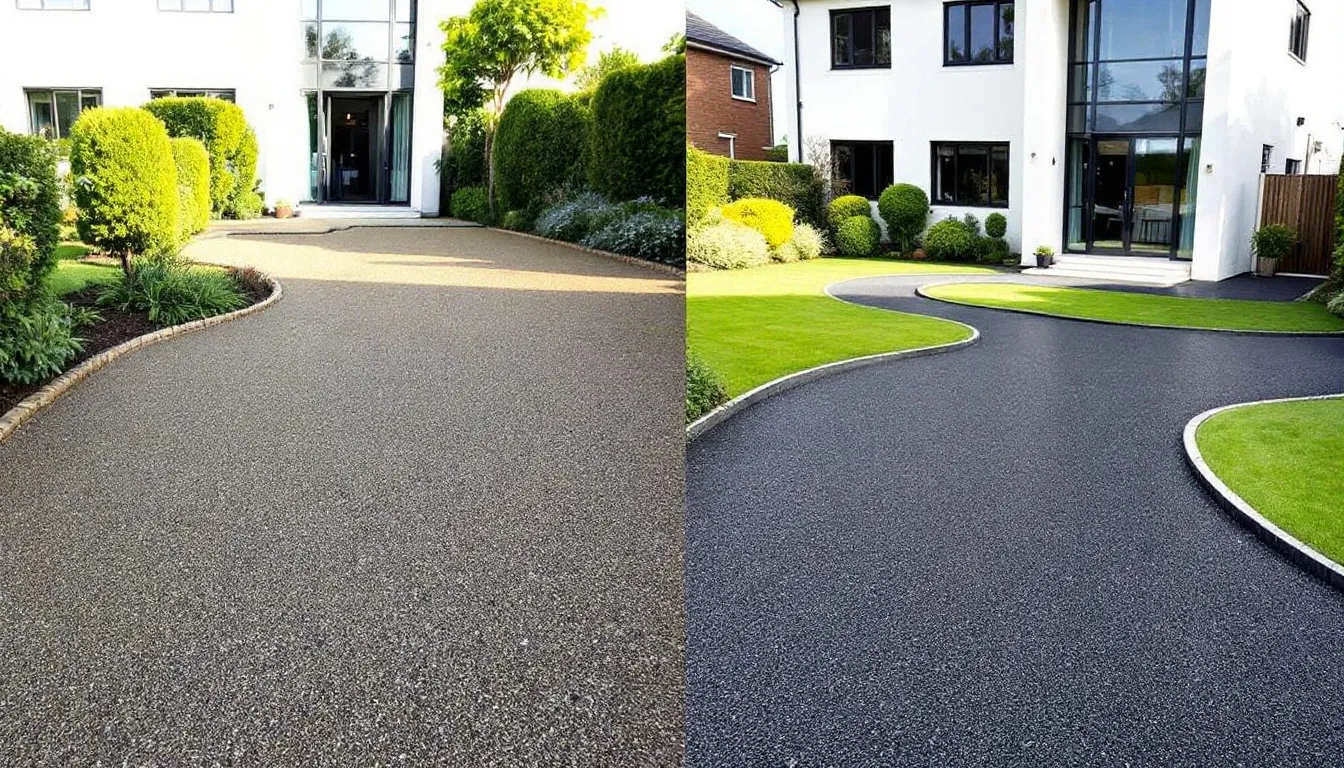
Resin bound systems have revolutionized the way we think about driveways. Unlike traditional paving methods, resin bound driveways offer a seamless and highly customizable finish that can be tailored to suit any property style. Whether you prefer a classic or contemporary aesthetic, resin bound kits offer a range of colors and textures to create the perfect look for your home. This instant kerb appeal is one of the primary reasons why resin bound driveways are becoming increasingly popular in the UK.
Start by listing some forbidden forms of the keyword “note” according to the rule 5. Then, find out if there’s a chance to incorporate the keyword without making any extra assumptions, according to the rule 2. Keep it short. Please note that the following steps are crucial for clarity and understanding.
Beyond their good looks, resin bound surfaces are incredibly durable. These driveways are designed to withstand the weight of multiple vehicles without cracking, making them an ideal choice for busy households. Thanks to UV-resistant resin, they are also less likely to fade or discolor over time, maintaining their vibrant appearance even under the harshest sunlight. Moreover, the flexibility of UV-stable resin means it’s less prone to cracking, ensuring longevity and consistent performance. And let’s not forget safety – resin bound driveways provide improved traction and are less slippery in icy conditions, making them a safer option during winter.
After an extensive selection of options, we can confidently say that our offerings cater to a variety of preferences and needs.
Beyond their good looks, resin bound surfaces are incredibly durable. These driveways are designed to withstand:
- The weight of multiple vehicles without cracking, making them an ideal choice for busy households
- UV-resistant resin, which is less likely to fade or discolor over time, maintaining their vibrant appearance even under the harshest sunlight
- The flexibility of UV-stable resin, which means it’s less prone to cracking, ensuring longevity and consistent performance
- Improved traction and slip resistance, making them less slippery in icy conditions, thus providing a safer option during winter
One of the standout features of resin bound systems is their permeability. These surfaces are fully porous, allowing water to drain naturally through them. This not only helps prevent puddles and waterlogging but also makes resin bound driveways suds compliant with Sustainable Urban Drainage Systems (SUDS), making them an environmentally friendly choice.
Whether you live in a traditional or modern home, a resin bound driveway can offer both aesthetic and practical benefits that enhance your property in multiple ways.
Key Materials for Resin Bound Driveways
When it comes to installing a resin bound driveway, choosing the right materials is crucial for ensuring a high-quality finish that will stand the test of time. A crucial component is the resin itself. DALTEX UVR resin, for example, is specifically designed for resin bound surfaces and is a solvent-free, two-part kit. This UV stable resin prevents discoloration from sunlight, ensuring your driveway retains its vibrant look for years.
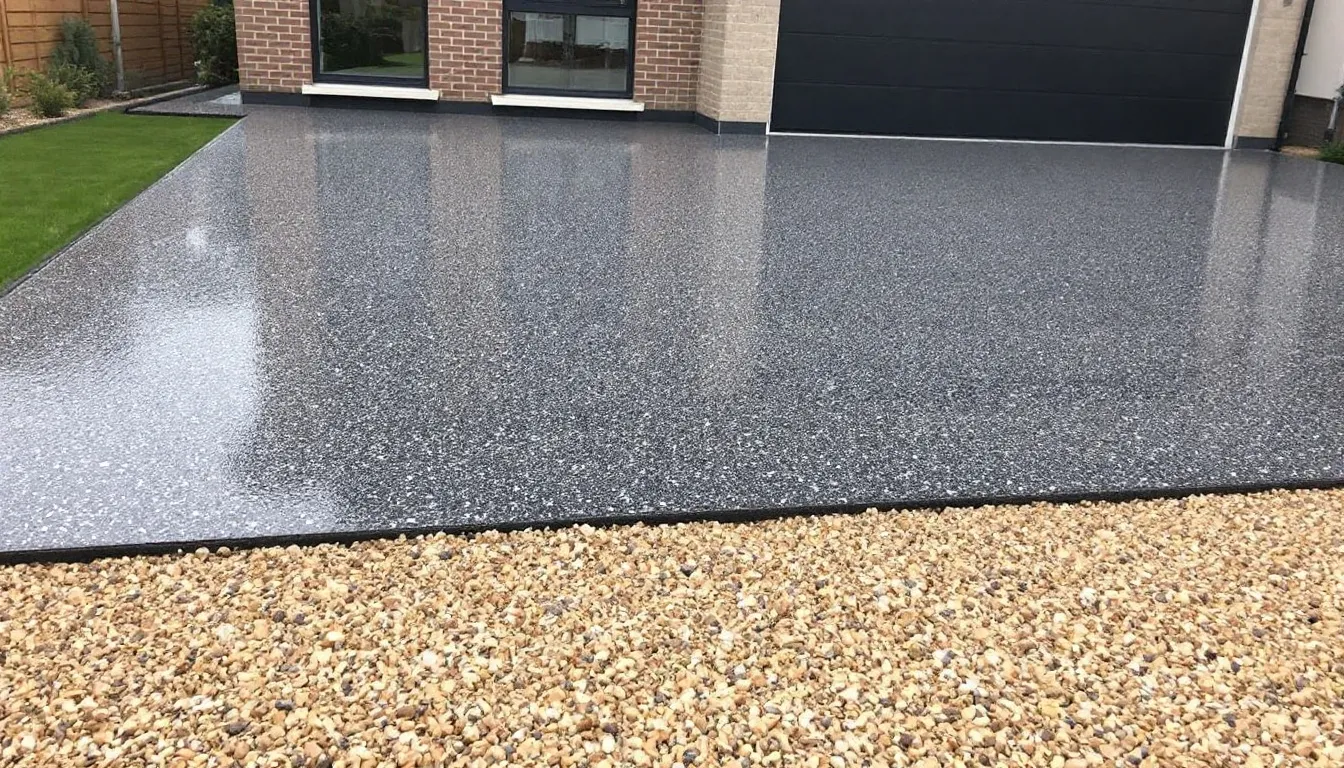
Aggregates are another critical element in resin bound systems. These can come in various sizes, with 6mm being the recommended size for driveways to provide a robust and smooth surface. Resin bound kits typically include high-quality natural stone decorative aggregates, which not only contribute to the aesthetic appeal but also the durability of the surface. A standard resin bound gravel kit usually contains four 25kg bags of aggregates and a 6.5kg two-part UV stable resin, ensuring you have the correct amount of materials for a consistent finish.
Using high-quality materials is essential for the longevity of your resin bound driveway. Poor quality components can lead to premature wear and tear, reducing the lifespan of the surface. Investing in premium materials like UV stable resin and well-graded aggregates ensures your driveway looks great and performs well under various conditions.
Whether you’re using DIY resin bound kits or opting for professional installation, the highest quality of your materials will significantly impact the final result for DIY enthusiasts.
Step-by-Step Guide to Installation
Installing a resin bound driveway might seem daunting, but with the right guidance, it can be a rewarding project. The process can be broken down into three main steps: preparing the base, mixing the resin and aggregate, and laying the resin bound surface. Each step is crucial for achieving a seamless and durable finish.
Starting with a solid foundation is key. The base must be clean, firm, and dry, ensuring that the resin bound system can bond effectively.
Once the base is ready, the mixing process begins. Aggregates and resin are thoroughly mixed to create a uniform blend that will form the surface of your driveway. Finally, this mixture is laid onto the prepared base and leveled to achieve a smooth, even finish. Let’s delve into each of these steps in more detail.
Preparing the Base
Proper base preparation is key to a successful resin bound driveway installation. Ensure the area is dry and free of contaminants to guarantee a strong bond between the base and the resin. Thoroughly cleaning the surface and addressing any drainage issues are critical tasks at this stage.
Excavation is another important aspect of base preparation. The base should be excavated to a depth that accommodates each layer of the resin bound system. A stable sub-base is crucial, with concrete, tarmac, or asphalt being suitable options. Ensuring that the sub-base is stable and well-prepared will provide the necessary support for your resin bound surface.
Mixing Resin and Aggregate
Achieving a uniform resin bound surface requires meticulous mixing of the resin and aggregates. Start by adding the aggregates to the mixer first, followed by the resin. Using a forced action mixer is recommended to ensure thorough mixing and to avoid air bubbles that could compromise the integrity of the surface.
Mix the resin and aggregate for a set duration until the mixture appears uniformly colored. Proper mixing is crucial for preventing color variations and ensuring the final product is consistent in appearance and performance. This step is vital for achieving a smooth and visually appealing resin bound driveway.
Laying the Resin Bound Surface
Once your mixture is ready, it’s time to lay the resin bound surface. Pour the mixed resin and aggregate onto the prepared base, spreading it evenly with a squeegee. Level the surface smoothly to ensure an even finish before allowing it to cure.
Natural aggregate should be applied over the wet resin during installation to create a durable and attractive surface. Typically, the resin bound surface can be walked on after 6 to 12 hours, allowing the resin to set properly. Patience during this stage is key to achieving the best results.
Drying and Curing Times
Proper drying and curing are critical for the success of your resin bound driveway. The ideal temperature for laying the resin bound product is above 7°C. Weather conditions play a significant role in curing times; for instance, in hot temperatures, the surface can dry in as little as 2 hours, whereas cooler weather can extend the curing time significantly.
Typically, a resin bound surface requires around eight hours to set before it can be walked on and approximately 24 hours before it can handle vehicular traffic. Ensuring the surface dries correctly is crucial to avoiding issues like streaks and ripples, which can occur if the driveway dries too quickly.
Paying attention to weather forecasts and planning your installation accordingly can help achieve the best results.
Cost Factors for Resin Bound Driveways
Several factors influence the cost of installing a resin bound driveway. The size and shape of the area, type of resin, choice of dried aggregates, and the condition of the base all play a role in determining the final cost. DIY resin bound driveway kits can offer cost savings while still providing high compressive and flexural strength for durability.
Breaking down these cost factors can help you better understand where your money is going and how to budget for your project. Let’s explore these considerations in more detail.
Size and Shape of the Area
The overall cost is significantly impacted by the size of your driveway. Additionally, its shape also plays a key role in determining expenses. Simpler shapes are generally less expensive to install compared to intricate designs that require more time and effort. For example, the cost of a resin bound overlay can range from £50 to £80 per square meter.
Additional costs to consider include waste removal, which can vary based on location. Skip hire prices, for example, can range from £160 to £440, depending on the size and duration of the hire. Additionally, the condition of the driveway base can increase costs, particularly if repairs or cleaning are needed before installation can proceed.
Type of Resin and Aggregate
The type of resin and aggregate you choose also affects the cost of your driveway. Smaller aggregates can help lower the overall cost of the project. However, if you opt for specialized tools for your DIY resin driveway project, these can incur additional costs that might offset some of the savings.
Choosing the right materials is essential for both cost-effectiveness and the quality of your resin bound driveway. Investing in high-quality resin and aggregates will ensure a durable and long-lasting surface that justifies the initial expenditure.
DIY vs Professional Installation
One of the biggest decisions you’ll face is whether to install the resin bound driveway yourself or hire a professional. DIY installation can lead to significant savings by avoiding labor costs. It also offers the flexibility to work at your own pace, which can be beneficial for busy individuals. Moreover, completing the project yourself can provide a rewarding sense of accomplishment and enhance your home improvement skills.
However, professional installers bring specialized knowledge and expertise that can result in a higher-quality finish. While the upfront cost may be higher, professional installation can be a better long-term investment for the quality and durability of your driveway. Mistakes in DIY resin installations can be costly and challenging to correct, so weigh your options carefully before deciding.
Maintenance Tips for Resin Bound Driveways

Maintaining a resin bound driveway is relatively simple but essential for longevity and appearance. Regular sweeping with a stiff broom helps remove debris and prevent moss growth. Using a jet wash with a pressure below 150 bar is recommended for cleaning, as excessive pressure can damage the resin.
Additional maintenance tips include avoiding turning the steering wheel while the vehicle is stationary on the resin surface to prevent tire marks. For weed control, manual removal or mild weed killers can be effective.
During winter, using a plastic shovel for snow removal is advised to avoid damaging the resin surface. Promptly addressing oil or fuel spills with soapy water can also help minimize stain retention.
Summary
In summary, resin bound driveways offer a blend of aesthetic appeal, durability, and environmental benefits, making them an excellent choice for any home. By understanding the installation process, cost factors, and maintenance tips, you can make an informed decision that will enhance your property for years to come. Whether you choose to undertake the project yourself or hire a professional, the key is to ensure that you use high-quality materials and follow best practices for installation and upkeep.
Frequently Asked Questions
How long does it take for a resin bound driveway to cure?
A resin bound driveway generally cures in about eight hours for foot traffic and around 24 hours for vehicles. It’s essential to wait this duration to ensure optimal strength and performance.
What type of base is suitable for a resin bound driveway?
A stable sub-base like concrete, tarmac, or asphalt is essential for a resin bound driveway to ensure its durability and stability.
Can I install a resin bound driveway myself?
Yes, you can install a resin bound driveway yourself, but be prepared for careful preparation and meticulous attention to detail to ensure a successful outcome.
What is the recommended size of aggregate for driveways?
The ideal size of aggregate for driveways is 6mm, ensuring proper stability and drainage. This size effectively supports vehicle weight while allowing for adequate water flow.
How can I maintain my resin bound driveway?
To maintain your resin bound driveway, regularly sweep it, use a jet wash at the correct pressure, and avoid making stationary turns with your vehicle. These practices will help preserve its appearance and extend its lifespan.